Posts tonen met het label Tips and Tricks. Alle posts tonen

20 juni 2017

Modern Traditions - Free project + tutorial

Ellie's Quiltplace Editions de Saxe Free Tutorial Pincushion

De laatste weken zijn ontzettend druk geweest en hoewel er vanalles te vertellen is, lukt het me niet elke keer om de tijd te vinden om het allemaal in een blogverhaaltje te gieten. Maar deze keer hoefde ik niks te doen. Nou ja, bijna niks. Het speldenkussen, speciaal hiervoor gemaakt met onze nieuwe Modern Traditions stoffencollectie, mocht ik wel zelf ontwerpen en maken, maar het mooie blog met de tutorial (klik) werd gemaakt door Olivia van les Editions de Saxe.
En geen schrik, ook als je geen Frans spreekt kun je met behulp van de foto's gemakkelijk aan de slag met dit gratis project. De Modern Traditions stoffen zijn vanaf dit najaar verkrijgbaar in de winkels, maar als je meteen aan de slag wilt, dan heb je vast nog wel wat leuke lapjes of restjes in je voorraad. Veel plezier!

The last couple of weeks have been very, very busy and although there's much to tell you, I don't always find the time to write everything down in a blog post. This time though, I had to do nothing. Well, almost nothing. The pincushion, specially made with our new Modern Traditions collection, was designed and made by me, but the lovely blog and tutorial (click) are written by Olivia from Les Editions de Saxe
No worries if you don't speak French. You can easily make this free project by following the steps as shown on the pictures. The Modern Traditions fabrics will be available as of the end of this Summer, but I bet you have some scraps from your favorite fabrics to use in this project. Happy quilting!

Ellie's Quiltplace Editions de Saxe Free Tutorial Pincushion

14 januari 2017

'Oplappen'...


Met de afwerkbies rond de Switch! was er nog één ding dat ik moest 'oplappen' voor de quilt klaar was.
Tijdens het patchen was er namelijk een naadje te kort afgeknipt. De donkerblauwe stof was gaan rafelen en zo was er een klein gaatje ontstaan in de top. Ik zag het pas tijdens het doorquilten en het zat natuurlijk ergens 'middenin' de quilt. Maar geen nood, overal is een oplossing voor.

After binding the Switch! there was only one more thing left to do before the quilt was finished. 
While sewing the top, I cut one of the seam allowances too small. The dark blue fabric started fraying and made a little hole in the top. I noticed it while quilting and of course, it was somewhere in the centre of the quilt. But no worries, there's a solution to every problem.


Bij Mams (want het was een lapje dat ik voor deze quilt met haar had geruild) knipte ik nog een extra stukje stof uit. Gewoon, zuinig, uit het hoekje van de lap.

At Mams (it was one of the fabrics I exchanged with her for this quilt), I cut an extra piece of fabric. Efficiently, from the corner of the Fat Quarter.


Thuis, tijdens het appliceren, bleek dat het lapje tot op de millimeter hetzelfde was als het originele stofje. Kijk maar naar de printjes! Zat het printje anders, dan was het ook prima geweest, maar dit is toch wel heel toevallig!

Back home, while appliquéing, I noticed the placement of the print on the new piece of fabric was exactly the same as on the original piece. You can see it in the picture! If it had been placed differently, I wouldn't mind at all, but this was a lovely coincidence!


Met kleine steekjes is het nieuwe lapje voorzichtig op het oude genaaid. Een klein stukje opnieuw doorquilten en ... klaar!

With small stitches, I appliquéd the new piece carefully over the old one. I quilted it again and... the quilt was finished!


Intussen is de Switch! al op reis geweest naar Frankrijk. Jeetje, dat is toch altijd spannend! Vorig jaar nog was een doos met 7 (!) van onze quilts een week lang vermist, maar gelukkig was de Switch! snel weer veilig thuis. Vanmiddag kan hij, voor het eerst helemaal af, getoond worden op de Show & Tell bij Maria in Heist-op-den-Berg.

Fijne dag!

In the meanwhile, the Switch! has traveled to France. I'm always a bit worried when a quilt is on its way. Only last year a box with 7 (!) of our quilts went missing for a whole week, but luckily, the Switch! arrived back home safely! This afternoon I will show it, for the first time when completely finished, at my Show and Tell Maria organises in Heist-op-den-Berg.

Have a nice day!

11 januari 2017

Te kleine scraps...? Niet voor mijn quilt!


Dat quilts vroeger vaak van restjes stof gemaakt werden, dat is niks nieuws. Stukjes stof van kleding en in de jaren 1930 ook van de 'feedsacks',... mensen waren ontzettend inventief en in een antieke quilt vind je dan ook van alles terug.

Antique quilts are often made from fabrics scraps, that's no news. Pieces from clothing and in the 1930's also from feedsacks,... people were very inventive and you can find many different kinds of fabric in old quilts.


Wat mij tijdens een bezoek aan de tentoonstelling in Sainte-Marie-aux-Mines vorig jaar opviel, was niet alleen de hoeveelheid restjes die in quilts gebruikt waren (van grote prints tot kleine motiefjes en van lichte tot donkere kleuren)...

While visiting a quilt show in Sainte-Marie-aux-Mines last year, I noticed that not only a large number of scraps (from small to large prints and light to dark colors) were used in the quilts ...


...maar ook dat er in veel quilts verschillende lapjes aan elkaar genaaid waren om zo tot een groot genoeg stofje te komen om te gebruiken in de quilt.

... but also that often small pieces of fabric were sewn to a larger piece so it was large enough to fit the quilt.


Soms waren die stukjes van eenzelfde stof (dit is één van mijn antieke sterretjes, een mooi voorbeeld!)...

Sometimes these pieces were from the same fabric (this is one of my antique star blocks, a beautiful example!)...


... soms ook van een andere.

... sometimes different fabrics were used.


Waar we tegenwoordig vaak snel even naar de quiltwinkel gaan voor een extra stukje stof of een nieuwe Fat Quarter gewoon meenemen 'voor de heb', omdat we hem mooi vinden, moesten de mensen vroeger soms puzzelen om de restjes die ze hadden passend te maken voor het blok of de quilt die ze in gedachten hadden.

Today, we often go to the quilt shop to buy a larger piece of fabric or we buy a Fat Quarter for our stash, because we love the color or print. Back in the day, people had to puzzle how to fit the small pieces of fabric into the block or quilt they had in mind. 


Mijn Carousel quilt is ideaal om restjes in te gebruiken. Ik heb er nog zoveel en ik wil ze liefst allemaal een plaatsje geven in de quilt.

My Carousel quilt is a perfect quilt to use my scrarps. I have so many scraps and I would love to use them all in my quilt.


Maar niet alle restjes zijn groot genoeg... Er zijn bijvoorbeeld een heleboel 'uiteindjes' van afwerkbiezen bij en die zijn te smal voor de driehoeken, laat staan voor de sterren in het midden van de blokken.

But not all scraps are large enough... I have many left overs from bindings and they're too small for the triangles, and especially the stars in the centre of the blocks.


Erg? Nee hoor, want als ik één ding heb geleerd van die prachtige antieke quilts, dan is het wel dat het allemaal niet perfect moet zijn. Een naadje extra of een ander lapje, het is niet lelijk, in tegendeel, het voegt juist zoveel extra charme toe.

Problem? No, not at all, because one thing I learned from the antique quilts is that it doesn't need to be perfect. An extra seam or a different fabric, it's not ugly, on the contrary, it adds to the charm of the quilt.


En dus kunnen mijn 'te kleine scraps' toch gewoon in mijn quilt!

And so even my smallest scraps find their way into my quilt!


Intussen krijg ik regelmatig vragen over deze quilt. De Carousel quilt is een eigen ontwerp, met hele grote blokken. Wil je er ook graag mee aan de slag? Dan kan dat binnenkort! Zodra de quilt klaar is schrijf ik voor jullie het patroon uit. Natuurlijk kun je al wel beginnen snuffelen tussen je restjes, want je hebt er héél véél nodig! ;o)

In the meanwhile I receive quite some questions on my quilt. The Carousel quilt is my special design, with large blocks. Feel like starting your own? That's possible, at least, if you wait a little longer. Because as soon as the quilt is finished, I will write the pattern for you. Of course you can start collecting scraps already, because you need many, many different ones! ;o)


26 juni 2016

Starwood Hill mini quilt...


Restjes... 

Scraps...


Allemaal eindjes van de Jelly Roll. Overgebleven van mijn Barn Dance.

All ends from the Jelly Roll strips I used for my Barn Dance.


Daar weten we wel raad mee en dus gingen Beestje en ik (hij lekker bij mij op schoot, zodat hij er goed bij kon en ik ook niet meer...) aan de slag.

We know what to do with that and so 'Beast' and I (he's sitting on my lap so we he could reach everything) got to work.


... natuurlijk niet zonder de nodige knuffels tussendoor, daar deed hij me wel aan denken ;o)

... of course not without the occasional cuddle, he made sure I didn't forget that part ;o)


Na een tijdje waren alle lapjes getekend, geknipt en per blokje aan elkaar gespeld. 
De laatste restjes die nog over waren gingen in het sigarenkistje. Die komen later nog wel eens ergens voor van pas!

After a while, all templates were drawn, cut and pinned together.
The remaining scraps went into the cigar box. They surely will end up in some future project!


De blokjes zaten al snel in elkaar (met de hand zoals altijd, mijn Singertje staat gewoon zo leuk op de foto ;o) ) en toen kon het quilten beginnen.

The blocks were finished within a couple of evenings (all sewn by hand as always. My Singer is just in the picture because it looks so nice ;o) ) and then it was time to quilt.


Zoals je weet naai ik altijd met Aurifil garen. De grijze klos met het lichtbruine garen is favoriet, want die draad is stevig en pluist niet. Voor mij heel belangrijk, want omdat ik altijd met een vingerhoed patch, breken veel andere garens al na een paar steken!

As you know, I always use Aurifil threads for sewing. The grey spool with the light brown thread is my favorite, because the thread is firm and doesn't fray. That's important, because I always use a thimble while sewing and many other threads break after just a couple of stitches.


In Keulen vroeg ik "Mr Aurifil" Alex Veronelli of zij ook quiltgaren maakten. 'Ja', zei hij: 'het garen op de grijze klossen.'
'Neeeee', zei ik. 'Dat is toch stevig naaigaren? Voor machinequilten zal het vast ook geschikt zijn, maar ik quilt met de hand.' 
(Dom om DE expert tegen te spreken natuurlijk, maar in mijn hoofd klopte het gewoon niet dat je hetzelfde garen voor zowel patchwork als quilten kon gebruiken. Ik had immers altijd geleerd dat je daar ander garen voor moest nemen!).

While in Cologne, I asked "Mr Aurifil" Alex Veronelli if the company produced quilt thread as well. 'Yes', he answered: 'you can use the grey spools'.
'Nooooo', I said. 'That's suitable for hand sewing, right? It's probably perfect for machine quilting as well, but I always hand quilt.'
(Really, what was I thinking? Arguing with THE expert, LOL! But in my head it just didn't make sence that I could use the same thread for sewing as well as quilting. I had always learned I had to use different kinds of thread for both!).


Alex verraste me kort daarna met een heel pakket met allerlei soorten Aurifil garens en kleurkaarten. 'Om eens uit te proberen'. En wat was er daarvoor beter geschikt dan mijn sterrenquiltje?

Shortly afterwards, Alex surprised me with several spools of Aurifil thread as well as color charts. 'To give it a try'. My star quilt seemed just the perfect project for that!


En ik kan niet anders dan Alex 200% gelijk geven. Het garen blijkt ook perfect quiltgaren te zijn! Zelf door de 3 lagen heen én met vingerhoed, blijft het mooi stevig en begint het niet te pluizen. Ideaal dus, want hoewel ik vind dat een quilt er best 'gebruikt' uit mag zien, moet het wel stevig in elkaar zitten!

I have to agree with Alex for 200%. The thread is perfect for hand quilting! Even when using a thimble and pulling it through the 3 layers of the quilt again and again, the quality of the thread remains perfect. That's ideal, because eventhough I think a quilt may look 'worn', it must be made with high quality materials.


En mijn sterrenquiltje?
Dat is helemaal klaar en heeft de naam 'Starwood Hill' gekregen. Het patroontje is een paar weken geleden vertrokken naar de leden van de Mini Quilt Club, want daar maakt dit quiltje immers deel van uit.

And my star quilt?
It's finished and called 'Starwood Hill'. The patterns were send to the members of our Mini Quilt Club a couple of weeks ago, because that's what this mini quilt is part of.


Overigens liggen hier nog allemaal klossen klaar om eens te proberen. Rode, groene, oranje, 6-draads,... Heeft iemand daar ervaring mee? Ik ben benieuwd :o)

There's quite a number of spools which I still need to try. Red, green, orange, 6 strand floss,... I'm wondering if you have tried them already and what's your favorite :o)

24 november 2015

Scrappy Stars Mini Quilt (het vervolg)...


De sterren uit een van mijn vorige berichtjes heb ik aan elkaar genaaid tot een mini quilt, met sashings tussen de blokken. Maar om daar de juiste stof voor te vinden, dat bleek nog een hele opgave: blauw was te koud, groen te groen en rood? Rood was mooi, maar ook een heel moeilijke kleur. Want kies maar eens de juiste tint - die ene tint die het quiltje nog meer warmte en uitstraling geeft.

The stars from my previous post were to be sewn together to a mini quilt, with sashings between the blocks. But choosing the right fabric for that appeared to be quite a task: blue was too cold, green too green, and red? Red was beautiful, but it's also a very different color. I wanted to pick the right shade, so it would brighten up the quilt a little.


Mijn rode stoffen belandden allemaal op de 'nee-stapel', want ze waren ofwel te roze, te bleek of te bruin... maar gelukkig, daar was hij ineens: het perfecte rode stofje! Het heeft een lief klein printje, heel geschikt voor een mini quilt. Dus tekende ik sashings af en begon ik te naaien.
Maar na 2 rijen had ik toch wel heel weinig sashings over... ik had me misteld en kwam er 3 tekort en de stof was op... Je weet misschien nog wel dat ik dit lapje ook heb gebruikt voor mijn Warm Winter Wishes naaldenmapje en het stukje dat ik daarin had gebruikt zou precies groot genoeg zijn voor de ontbrekende sashings. Maar ja, daar had ik nu natuurlijk niet zo veel aan...
Wat nu?

I placed all my red fabrics onto the 'no pile', because they were too pink, too pale, too brown,... but finally there it was: the perfect red fabric! It has this cute little print, perfect for a mini quilt. So I started drawing the sashings, I cut them and I started sewing.
But after 2 rows, I discoverd I had miscounted the sashings and I was 3 short and I ran out of fabric...  You might remember I used this fabric in my Warm Winter Wishes needle case, and the piece I used there would have been just enough for my missing sashings, but that of course couldn't solve the problem...
What was I to do?


Ineens herinnerde ik me dat ik nog wat nieuwe stoffen had gewassen en dat die nog in de wasmand lagen te wachten om gestreken te worden. Er was één rode stof bij en die bleek perfect te passen!

All of a sudden I remembered I had some new fabrics that weren't ironed yet and therefore were not in my stash, but still in my laundry basket. There was just one red fabric among them, but it matched very well!


Omdat 3 andere sashings rechts onderaan in de hoek er misschien wat gek uit zou zien, heb ik de baantjes rond het middenblok losgemaakt en vervangen door de nieuwe. Ik moet zeggen, ondanks dat het niet echt de bedoeling was zo, ben ik wel heel blij met hoe het eruit ziet. Het is een beetje eigenwijs, grappig en niet zo 'standaard' (en als ik je niet had verteld dat ik te weinig sashings had, dan had je vast gedacht dat dit zo de bedoeling was, LOL!)

Because 3 different sashings in the lower right corner would look a bit funny, I unpicked the ones around the centre block and replaced them by the new ones. And I must say, eventhough it wasn't planned this way, I'm very happy with the result. It's a bit quirky and surprising and it gives the quilt something special (and if I hadn't told you this story, you probably would have thought I did this intentionally, LOL!).


Hetzelfde probleem had ik met de achterkantstof. Te snel gemeten en ook een paar cm te klein. Gelukkig heb ik met mijn Naumann er snel een extra stukje roze (een schattig lapje met kleine bloempjes) aan gezet en was ook dit probleem zo weer van de baan.

The same problem occured with the backing fabric. Measured to quickly I was some centimeters short. Thanks to my Naumann and an additional piece of pink fabric (a really cute one with small flowers), this problem was solved quickly.


Tijdens de tentoonstelling van antieke log cabin quilts in Ste Marie afgelopen september was mij opgevallen dat veel van de antieke quilts geknoopt waren in plaats van doorgequilt. Het ziet er leuk uit en aangezien de patroondelen voor mijn mini quilt maar klein waren en er dus veel naadjes dicht op elkaar zaten zou quilten niet zo gemakkelijk zijn. En dus dacht ik: 'waarom probeer ik dit niet eens?'

While visiting the exhibition of log cabin quilts in Ste Marie last September, I noticed many of the antique quilts were tied instead of quilted. It looks lovely and since the pieces in my mini quilt are quite small and the many seams would make quilting more difficult, I thought 'why don't I try this myself?'


Ik heb bijpassende kleuren borduurgaren gekozen voor de blokken en ecru voor de hoekblokjes. Ik heb telkens met 4 draadjes tegelijk gewerkt, omdat ik dacht dat 2 draadjes niet zo'n pluizig effect zouden geven. Dit is eigenlijk een heel makkelijke en super snelle manier om de 3 lagen van je quilt aan elkaar te maken en hoewel ik het niet voor een sprei zou doen (quilten is toch iets steviger, zeker als je je quilt vaak wast), is het perfect voor mijn sterrenquiltje!


I choose matching embroidery threads to all blocks and ecru for the corner stones. I used 4 threads of embroidery floss, I thought maybe 2 wouldn't make this nice, fuzzy tie, and got started. This method is really easy and really fast and eventhough I wouldn't use it for a bed quilt (quilting is more firm, especially when you plan to launder the quilt regularly), it's perfect for my star quilt!


Ik heb het quiltje afgewerkt met een mooie blauwe bies. Een lapje dat al een aantal jaren in mijn voorraad zat en wat heel mooi bij deze mini past.

I finished the quilt with a beautiful blue binding. A fabric I had in my stash for quite some time, which came in perfect for this mini. 


Het quiltje het Scrappy Stars (dat hoef ik vast niet verder toe te lichten :o)), is 42 x 42 cm en maakt deel uit van onze Mini Quilt Club.

The quilt is called Scrappy Stars (no need to explain that!), measures 42 cm x 42 cm and is part of our Mini Quilt Club.


Het volgende Club patroon komt in januari uit en hoewel ik natuurlijk nog niet te veel mag verklappen omdat het een verrassing is, kan ik wel al vertellen dat ik iets nieuws aan het uitproberen ben, iets dat ik nog nooit eerder in mijn quilts heb gedaan. Hopelijk lukt het en wordt het zoals ik hoop, maar de eerste poging ziet er al veelbelovend uit!

Fijne dag!

The next Club pattern will be released in January and eventhough I have to keep it a surprise, I can tell you I'm trying something new, which I have never done before in any of my quilts. Hope it works out fine, but my first attempt looks really nice!

Have a nice day!

21 november 2015

Waar haal je zoveel quilt-tijd vandaan? - 8 tips om lekker aan de slag te gaan!


Geregeld vragen mensen mij waar ik zoveel quilt-tijd vandaan haal als ik ook nog fulltime werk én mijn eigen bedrijf, Ellie's Quiltplace, run.
Eigenlijk is het vooral een kwestie van een goede voorbereiding. Dit is heel gemakkelijk en met een beetje zelfdiscipline moet het iedereen lukken.

I'm often asked how I manage to get so much quilting done, besides having a fulltime job and having my own business, Ellie's Quiltplace.
Actually, it's all a matter of a proper preperation. It's very easy and, with some self-discipline, I think everyone can do it.


Voor we beginnen, mag je niet vergeten dat quilten altijd aangenaam en ontspannend moet zijn. Het gaat vaak al zo belachelijk snel in het leven en voor mij is quilten even de klok stilzetten en genieten van wat Ellen-tijd. Het is geen wedstrijd om zo snel mogelijk te werken of zoveel mogelijk quilts te maken. De volgende tips helpen mij om mijn quilttijd beter in te delen en er zo nog meer van te kunnen genieten.

Before we start, don't forget that at all times, quilting needs to be fun and relaxing. We hurry through our lives and for me, quilting is like stopping the rush for a moment and enjoy some Ellen time. It's not a competition to get as much done as possible. The following tips proved to help me plan my quilting time more efficiently, so I can enjoy it even more.

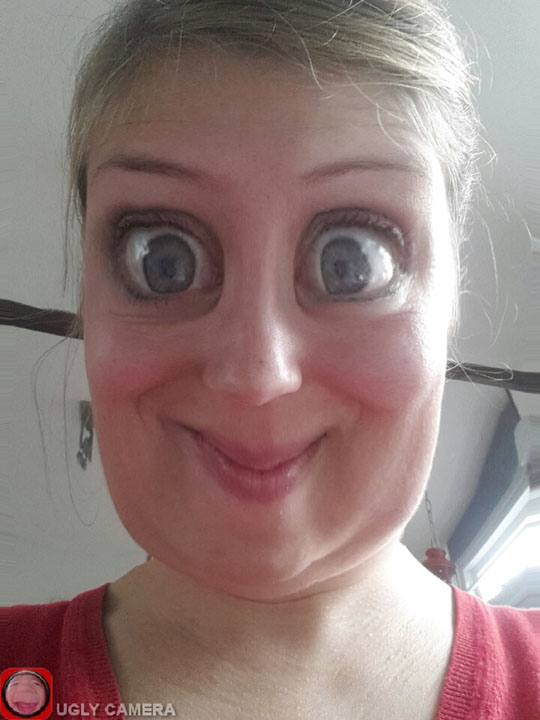
(Met dank aan ZusJe en haar 'gekke gezichten App', LOL)
(Thanks to ZusJe and her 'funny faces App', LOL!)

1. Een goed humeur.
Het klinkt misschien gek, maar ik begin nooit aan een quilt als het 'weer een van die dagen' is of als ik niet genoeg tijd heb en dingen snel snel moet doen. Ik weet dat ik dan niet de 'perfecte' stoffen zal vinden of dingen verknip...
Op een goede dag en met de goede motivatie gaan dingen als vanzelf veel makkelijker en sneller. Ik bereid mijn quilts voor in het weekend en ik patch en quilt door de week.

1. Make sure you're in a good mood.
It might sound silly, but I never start a quilt when it's 'one of those days' or when I don't have enough time to do things properly. I know I will not find the 'perfect' fabrics, cut several parts wrong,... Instead, on a feel good day and with the right motivation, things will go smooth and twice as fast.
I prepare my quilts during the weekend, when I have enough time to prepare and I sew during the week.


2. Wees voorbereid!
Begin met een plan. In mijn geval is dit een eigen ontwerp, maar het kan natuurlijk even goed een bestaand patroon van een blok of quilt zijn. Lees voor je begint het patroon goed door, beslis hoe groot je de quilt gaat maken, hoeveel blokken erin komen,... en bepaal hoeveel stof en welke andere materialen je nodig hebt voor je effectief aan de slag gaat.
Heb je iets niet in huis, koop het dan. Het is niet fijn als je er halverwege achter komt dat je niet genoeg stof hebt of dat je klosje leeg is en je geen nieuw meer op voorraad hebt...

2. Be prepared!
Always start with a plan. In my case, this is a design I made, but it can of course also be an existing pattern for a block or quilt. Make sure to read the complete pattern, decide on the size of the quilt, number of blocks,... and define the required fabrics and tools before you start.
If you miss anything, make sure to buy it. You wouldn't want to have to stop halfway, because you're missing some fabric or you ran out of thread...


3. Zoek een mandje...
... liefst zonder Kapitein Kat erin ;o)
Ik bewaar mijn werkjes in mandjes, één voor elk project, zodat alles mooi gesorteerd is en niet door elkaar ligt. Natuurlijk kun je ook koekblikken, plastic opbergboxen, tassen,... gebruiken - wat voor jou het beste werkt.
Probeer niet om de blokken voor een tweepersoonssprei in een klein koekblik te proppen, dat werkt niet... Kies een mandje waar al je materialen ruim in passen.

3. Find yourself a basket...
... preferably without Captain Cat in it ;o)
I keep my patchwork in baskets, one for each project, so things won't get mixed up. Of course, you can use cookie tins, plastic containers, bags,... as well - whatever you prefer.
Don't try to stuff blocks for a king sized quilt into a small cookie tin, it won't work... Instead choose a basket which is the right size for all your materials.


4. Stoffen verzamelen.
Dit is het leukste deel! In je patroon lees je precies hoeveel je van alles nodig hebt, of - als je bijvoorbeeld een restjesquilt wil maken - verzamel je stoffen per blok of ineens voor heel de quilt en bewaar ze in de mand, samen met je patroon.
Mensen vragen me wel eens of er dan nog wel ruimte is voor spontaniteit in mijn quilts. Natuurlijk, want of je nu de stoffen in het weekend ineens kiest of je kiest er elke avond een aantal, het is en blijft een ingeving en een keuze van dat moment.

4. Collect your fabrics.
This is the fun part! Consult the requirement list of your pattern, or - if you're making a scrap quilt - collect all fabrics you want to use per block or for the whole quilt at once, and keep them in your basket, along with the pattern.
People sometimes ask me if there's still room for spontaneity. Of course, because whether you choose your fabrics all at once, or every night just some, it's always the choice and the inspiration of that moment.


5. Stoffen knippen.
Afhankelijk van de grootte van de quilt en het aantal blokken knip ik alle stoffen ineens (voor een mini quilt) of per (aantal) blokken (voor grote quilts). Ik knip altijd voldoende blokken om heel de week mee door te komen. Ik vind het verschrikkelijk als ik op donderdag ineens niks meer te doen heb, want na een lange werkdag heb ik vaak geen energie meer om nog iets nieuws voor te bereiden. Meestal eindig ik dan in mijn stoel, zonder werkje, en voel ik me een beetje ontevreden omdat ik niks heb kunnen maken.
Overigens, gooi nooit je mallen weg, maar bewaar ze in de mand, in een insteekhoesje of een enveloppe, voor het geval je iets vergeten bent te knippen of je je verknipt tijdens het naaien.

5. Cut your fabric.
Depending on the size of the quilt and the number of blocks, I cut all fabrics at once (mini quilts) or per couple of blocks (large quilts). I always make sure I will prepare enough blocks to get me through the week. I hate to discover on a Thursday that I have no more blocks left to make, because I know after a long day I won't have the energy to prepare new ones. Instead I will do nothing and feel a bit dissatisfied. 
By the way, don't throw away your templates but keep them in your basket, in a plastic sheet protector or envelope in case you forgot something or cut waste and need them again.


6. Bepaal de plaatsing van de stoffen.
Als je eenvoudige blokken maakt, waar de plaatsing van de mallen en kleuren direct duidelijk is, kun je deze stap overslaan.
Wanneer ik blokken met veel verschillende stoffen en een specifieke plaatsing van de mallen maak, dan heb ik geen zin om, voor ik ga naaien, nog te moeten puzzelen wat waar moet komen.
Voor ingewikkelde blokken en samplers gebruik ik mijn blokkenboek (klik). Voor eenvoudiger quilts (1 blok, maar met verschillende kleuren) leg ik de blokken op tafel en maak ik er foto's van met mijn gsm. Omdat ik mijn gsm altijd bij me heb, kan ik als ik ga naaien gemakkelijk en snel terugvinden welke stof waar komt. Je kunt ook een kleurindicatie aangeven op je patroon. Kijk wat voor jou het beste werkt.

6. Figure out your fabric placement.
For easier blocks, where templates and fabric placement can't get mixed up, you can skip this tip. 
In case of multicolored blocks with a specific fabric placement, I don't like to have to puzzle before I can get started. I use a block book (click) for complicated blocks and sampler quilts. For easier quilts (1 block, different colors), I lay out the blocks on the table and take pictures of the fabric placement with my cell phone. Since I always keep my phone close, I can easily look up which piece of fabric to put where. You can also mark the colors in the diagrams of your pattern. Find out what works best for you. 


7. Sorteer je lapjes per blok of rij.
Ik bewaar al mijn geknipte malletjes netjes gesorteerd per blok, zodat ik meteen aan de slag kan. Hetzelfde geldt voor tussenbanen, hoekblokken, randen,...
Ik speld een klein stukje papier met het nummer van het blok of de baan op elk stapeltje stoffen, zodat het keurig bij elkaar zit.

7. Sort fabrics by block or row.
I keep all fabric pieces sorted by block, so I can just grab it and start sewing. The same goes for sashings, corner stones, patchwork borders,... 
I pin small pieces of paper with a block or row indication on each pile, so nothing can get mixed up. 


8. Aan de slag!
Nu alles netjes voorbereid is, kan ik aan de slag! Als ik na het werk thuis kom (en eten heb gekookt, de keuken heb opgeruimd en alle bestellingen, e-mails en andere Ellie's Quiltplace-dingen heb gedaan), pak ik mijn mandje, pak ik blok nummer 1 en kan ik beginnen.
Vergeet niet om, als je stopt, alles weer netjes op te bergen, zodat je morgen niet moet zoeken waar je bent gebleven, maar meteen weer kunt verder gaan.

Hopelijk werkt dit voor jou even fijn als voor mij!
Succes en vooral veel quiltplezier!

8. Get started!
Now that everything is well prepared, I'm ready to start sewing! When I come home after work (cooked dinner, cleaned the kitchen and have handled all orders, e-mails and other Ellie's Quiltplace-things), I grab my basket, pick block #1 and get started. 
Don't forget to put everything back in place when you finish, so next time you know exactly where to continue.

Hope this works as great for you as it does for me!
Good luck, but most of all: happy sewing!
Related Posts Plugin for WordPress, Blogger...